Initial File Upload
Step 1: From the main dashboard, select Upload a recording or PDF. Step 2: Choose the desired PDF file from your local machine.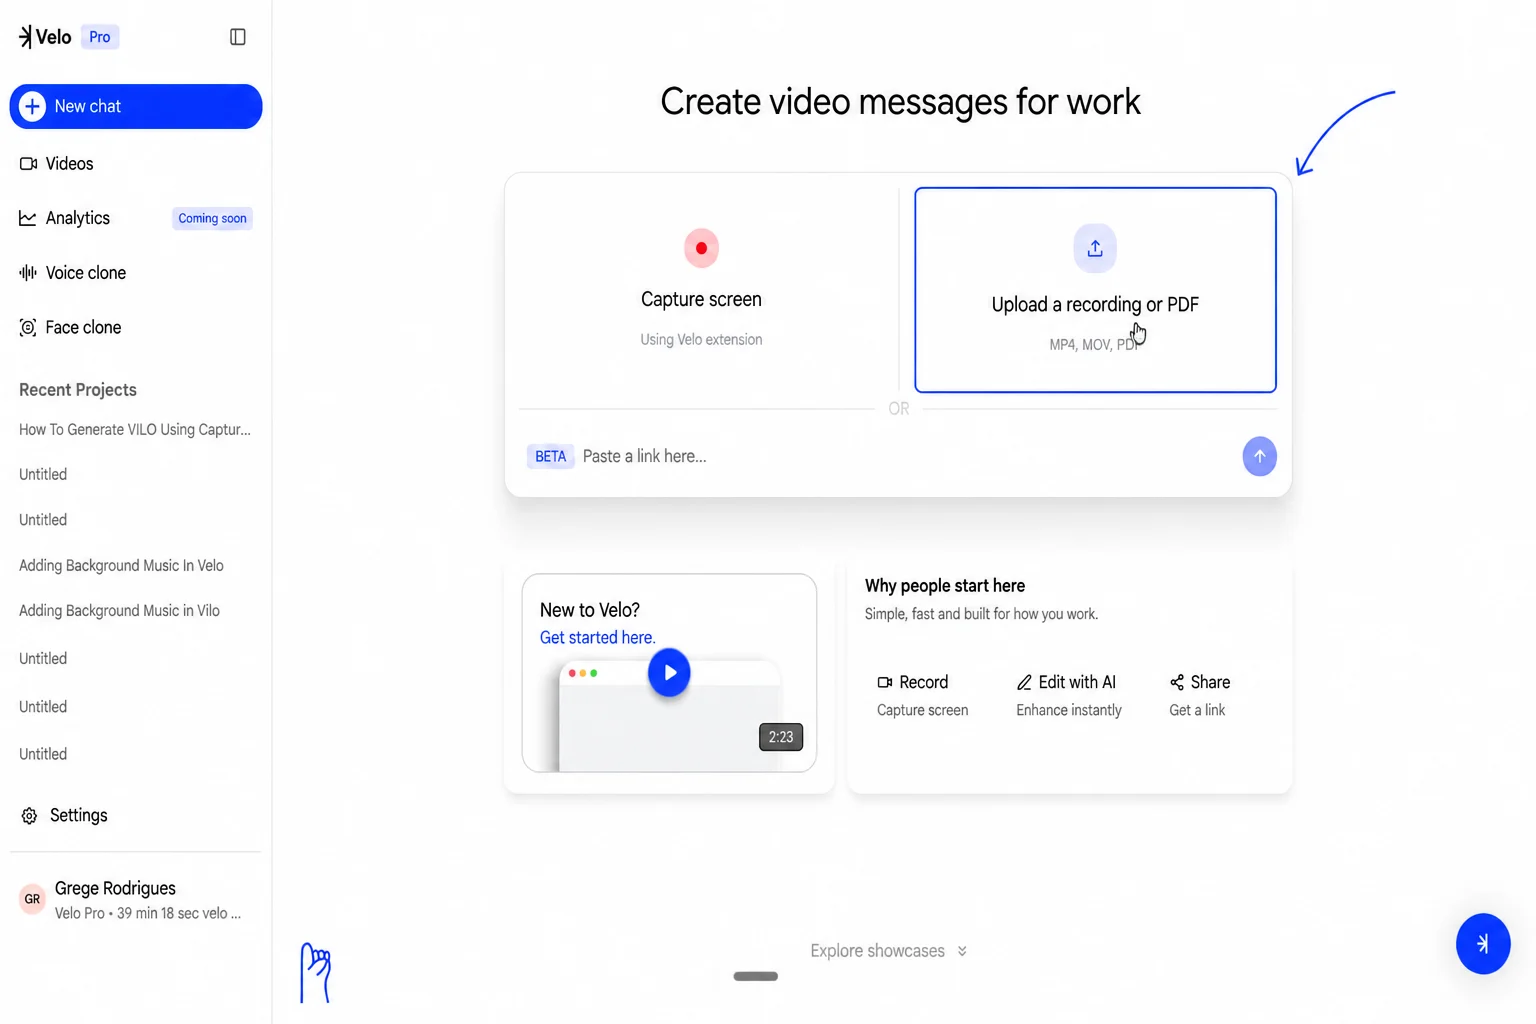
Configuring AI Instructions
Once the PDF loads, you must define the scope and tone of the explanation. Step 3: Choose which pages to include. You can select All pages or specify a range. Step 4: Enter Instructions for the agent to set the professional tone. For example, you can prompt the agent to “Explain this PDF like a customer success engineer.” Step 5: Select Continue with prompt to allow the system to analyze the document content.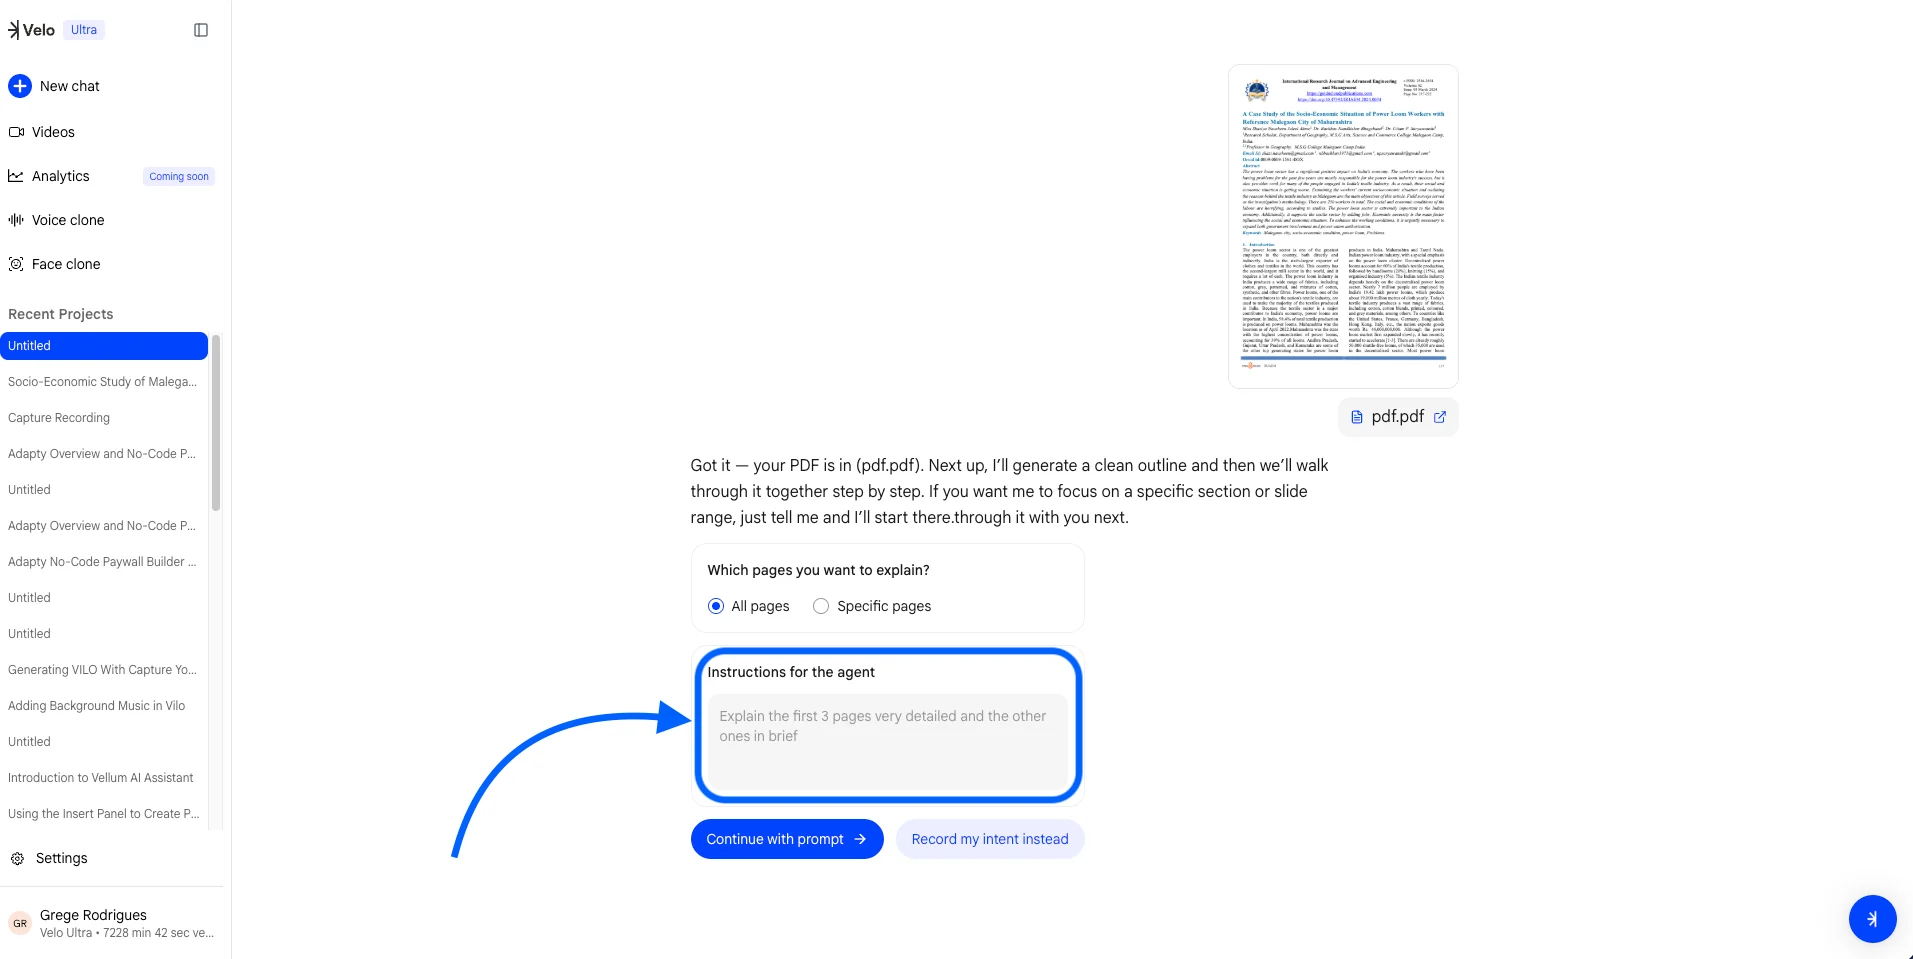
Defining Persona and Audience
To ensure the generated voiceover resonates with viewers, the system requires specific setup details. Step 6: Select a persona for the voice to carry, such as Customer Support, Founder, or Product Manager. Step 7: Identify the primary audience, such as Customers, Internal team, or Management. Step 8: Provide any additional context if necessary, then click Submit.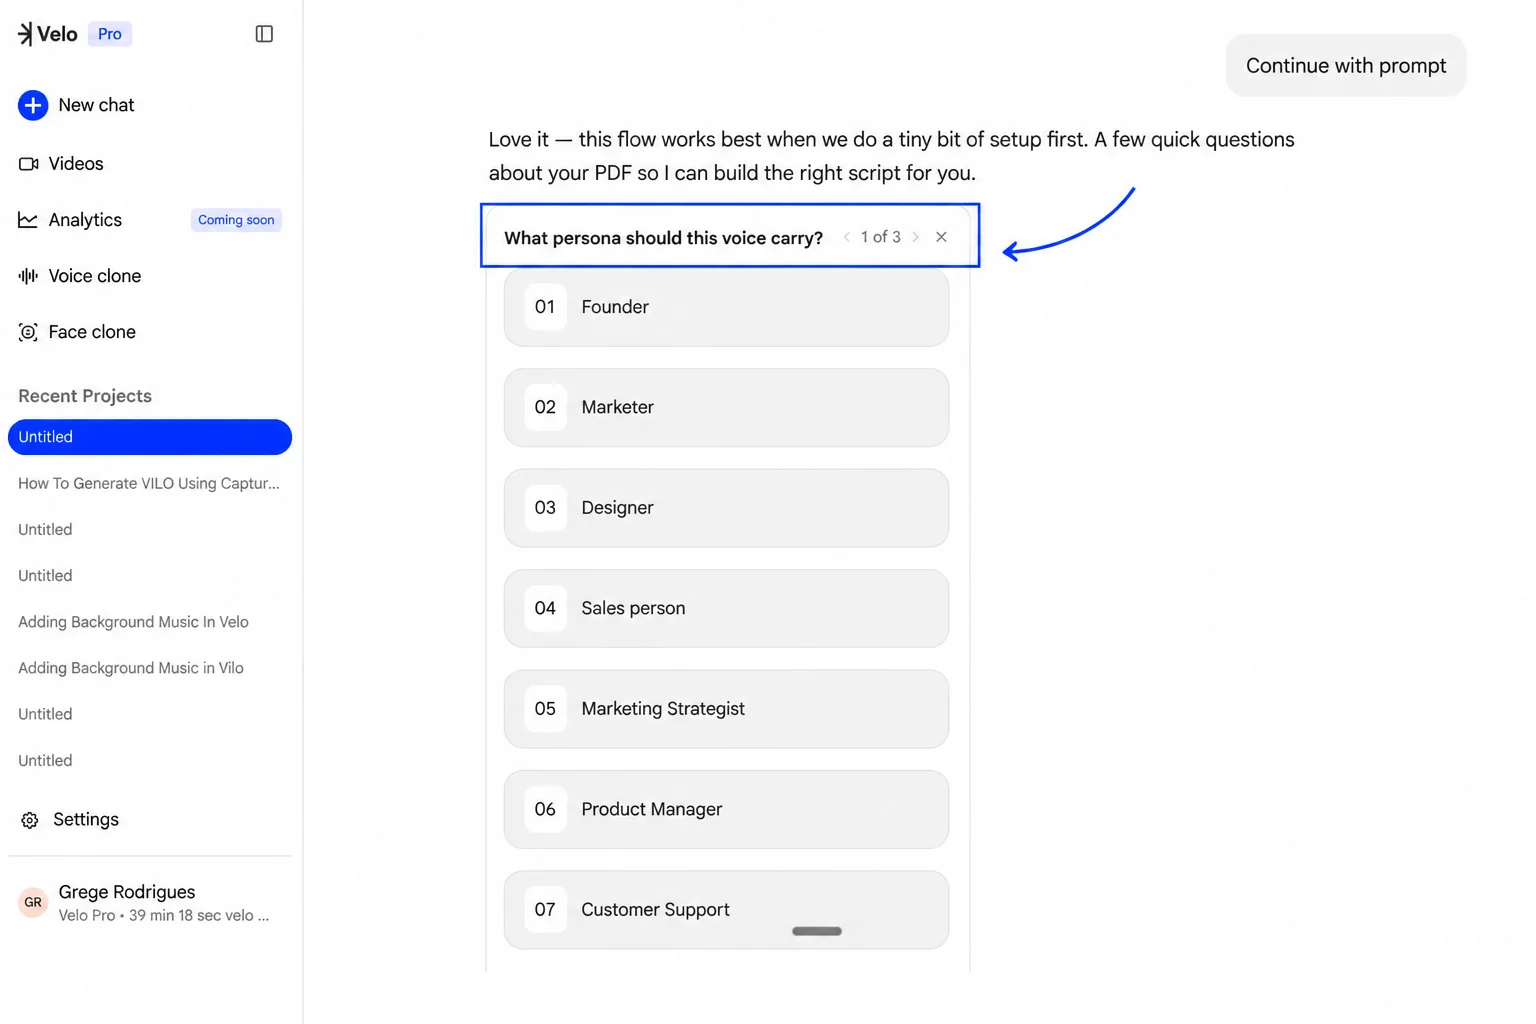
Voice Selection and Script Review
After the initial setup, you can customize the audio and review the auto-generated scenes. Step 9: Choose between a Public Voice or a personalized Voice Clone. Step 10: Review the generated script. The AI divides the content into distinct scenes. Step 11: Edit the narration text for any scene that requires adjustment.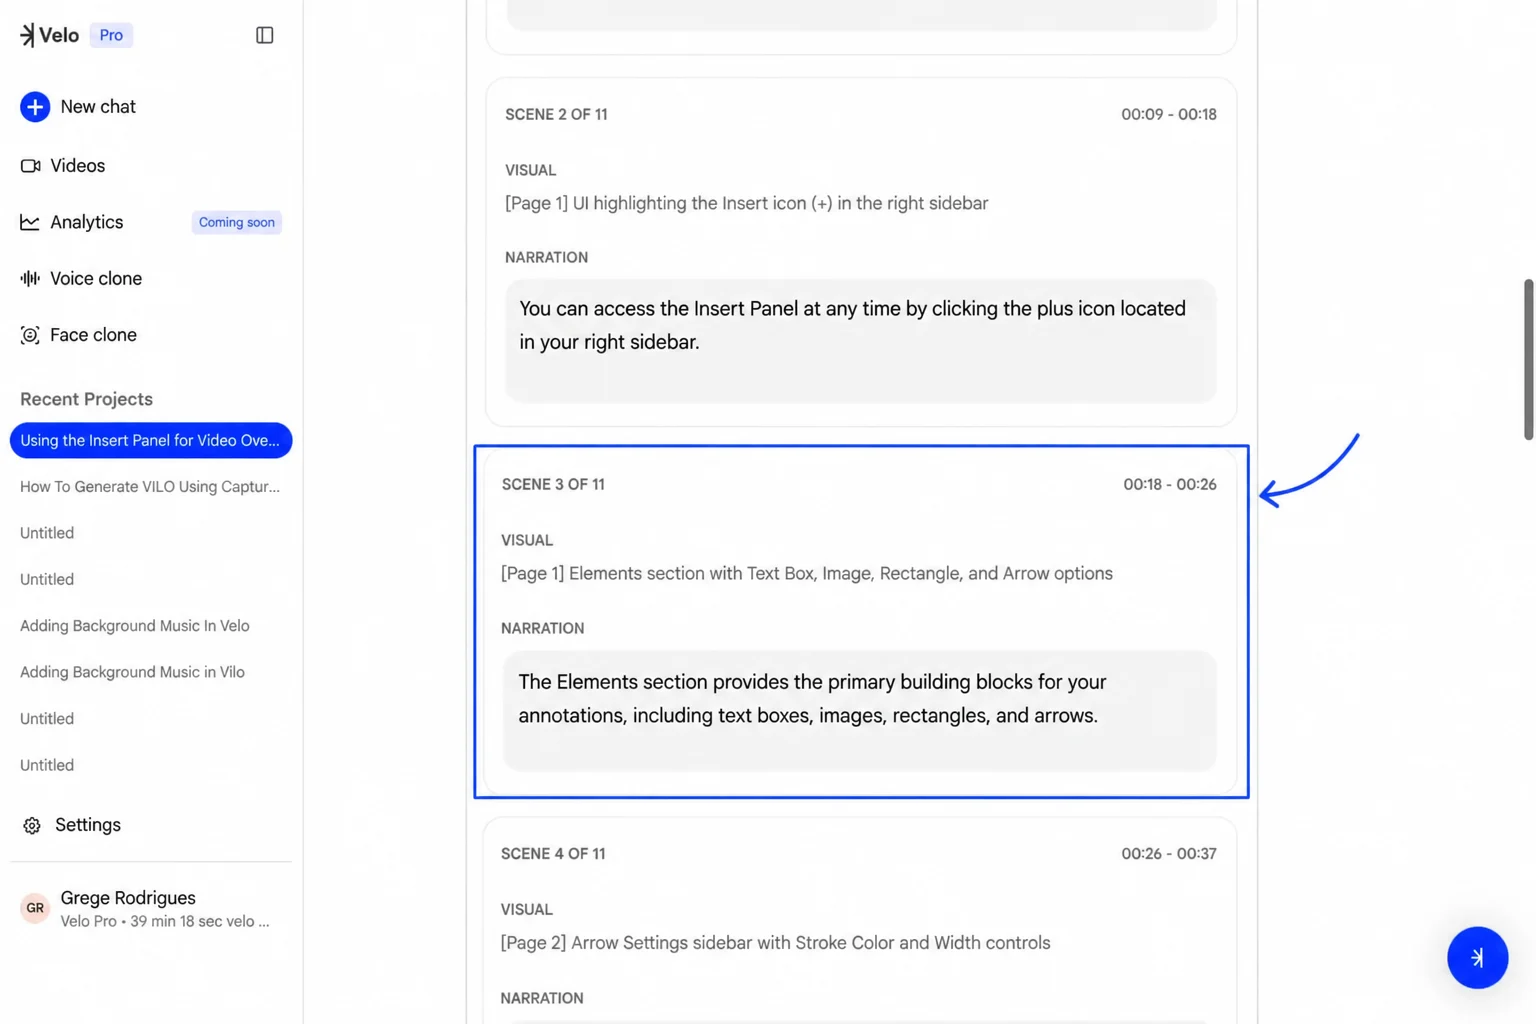
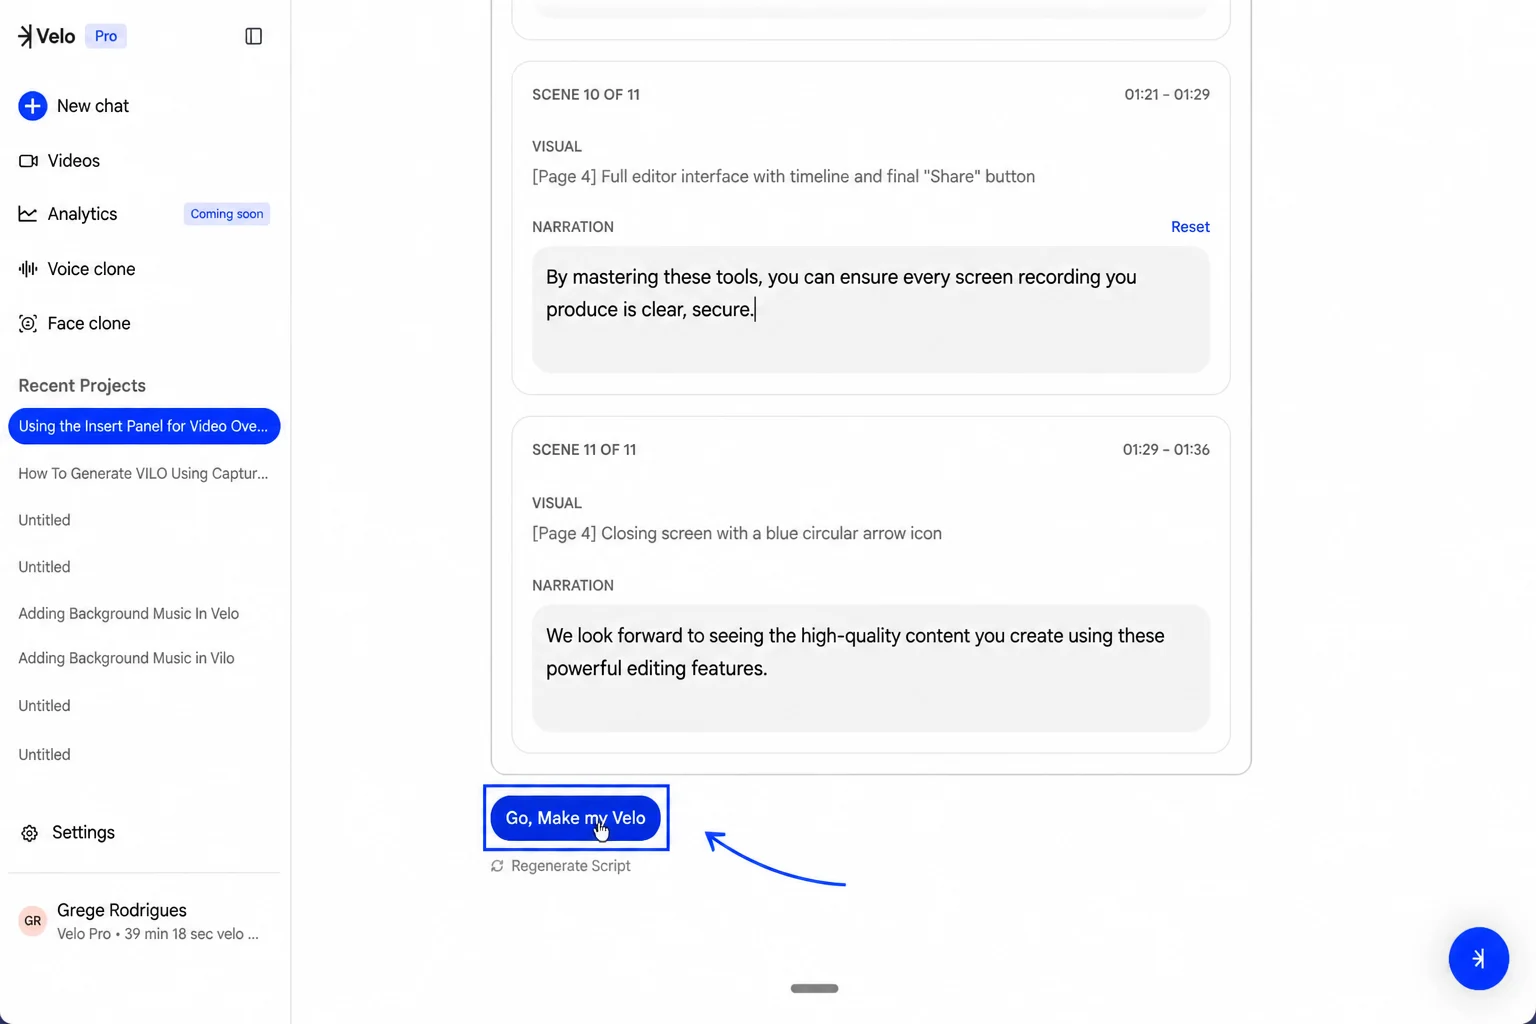
Finalizing Video Generation
Once the script and scene breaks are approved, initiate the final production phase. Step 12: Click the “Go, Make my Velo” button at the bottom of the editor. Step 13: Monitor the progress bar as the system matches the new audio to the visual scenes.